
Have you ever wondered how easy (or difficult) it is to create and set up a cluster of single-board computers? Probably not, since there's already a bunch of articles and videos at your disposal to answer this very question. But of course, despite all of that, I wanted to try it out myself, so here we are. Like what a certain car show presenter often says, "How hard can it be?"
This is the first of a two-part series, with this post being the hardware side (from acquiring the parts to setting it up), and the second part being the software side.
But why, though?
Well, because I can. 😂 But seriously, I've been a bit more conscious about my power usage at home, especially since I'm always at home because of the pandemic. So recently, I've been making progress in decreasing my energy consumption, mainly replacing appliances with more power efficient ones, and also dabbling into renewable energy (will probably talk about it in another blog post).
As for the stuff in my server rack, I have already started to reduce my power usage there too. The Dell R610 server where I usually put my VMs is now turned off more often than not (I only turn it on once a week since there's a Windows VM that I need to access for work). I purchased a larger, 4U Supermicro 36-bay server to replace the Dell R710 as my primary datastore while consuming the same power, and I lent my other Dell R710 to my brother so we can both use it, as a regular NAS/server for him, and in my case, offsite backup via TrueNAS replication tasks.
Pro-tip on how to save on power bills with a #homelab: Lend a server or two to someone you trust, and let them use it. Then let them know you're gonna use a portion of it for offsite backup. 😉
— JJ Macalinao (@JMacalinao) November 24, 2021
What about the Kubernetes cluster? This is where the Pis come in. With my previous setup, there are 7 VMs functioning as nodes in the k3s cluster, distributed between three Hyve Zeus servers. As it currently stands, these servers consume around 150 watts in total, which is actually not that bad. But obviously, we can do better. The plan is to create a new, more power-efficient cluster, and then repurpose the servers (possibly use them to sell web hosting services).
The quest for finding a bunch of Pis on stock
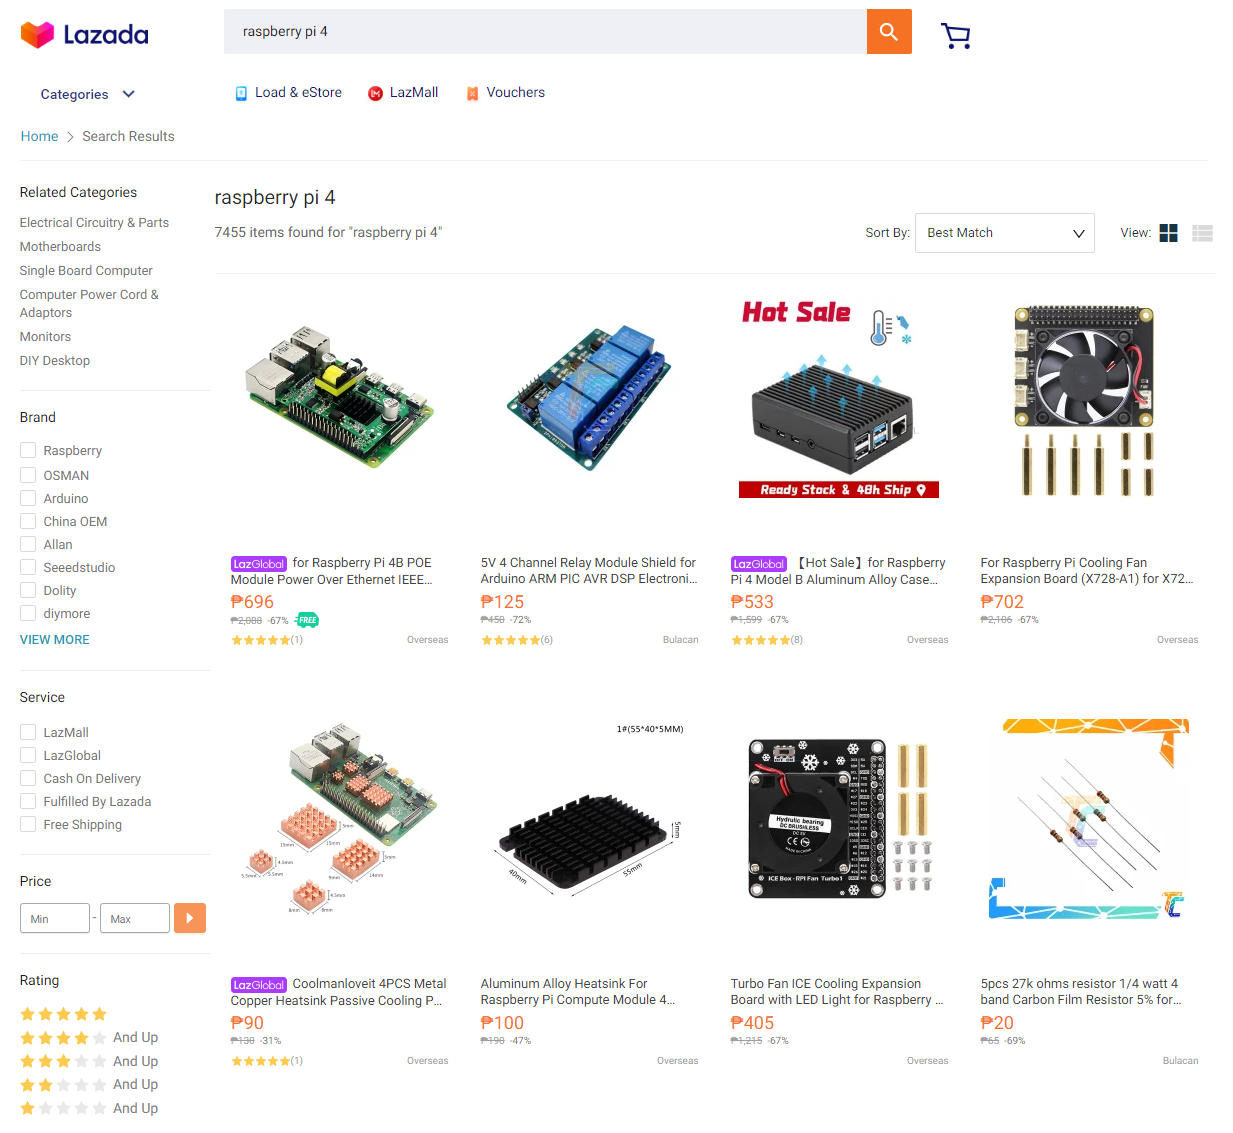
So I tried to find Raspberry Pis to purchase online, with the usual suspects in Philippine online shopping – Lazada and Shopee – but they were nowhere to be found. Either they were out of stock, ridiculously expensive (usually from unknown sellers), or they just don't exist at all:
I then checked Amazon US in the hopes that maybe it's just a Philippines thing, but nope: Everything in there was double its usual retail price.
Knowing that I won't be able to buy any Raspberry Pis at a fair price, I started to look for alternatives. I specifically looked for ones that have a similar footprint as a Raspberry Pi 4 Model B. I found several – the Pine ROCK64, the Orange Pi PC, and the Radxa Rock Pi 4. After much deliberation, I chose the Rock Pi 4 because of the following:
- More powerful SoC than a Raspberry Pi 4 (or the alternatives)
- A bunch of storage options (microSD, eMMC, and M.2 NVME)
- Power-over-Ethernet support (PoE HAT required)
- Sold in an online store where I can pretty much buy almost everything I need
- Fairly close shipping location with good shipping options (China, via DHL)
And so I went to their online store and picked the A+ variant (with PoE, but without WiFi and Bluetooth) with 4GB RAM and 32GB built-in eMMC, a PoE HAT, an m.2 NVME extension board, and then multiplied them by eight. I decided to buy eight of them because at the time, it looked like that was the most I could fit in a BYO Pi rack mount by MyElectronics.nl, and I was dead set in using that rack mount after I saw it in a Jeff Geerling video. (After assembling them, it looks like I could fit 16 in them if I assembled the parts differently, but only if I didn't put heatsinks on the SoCs.)
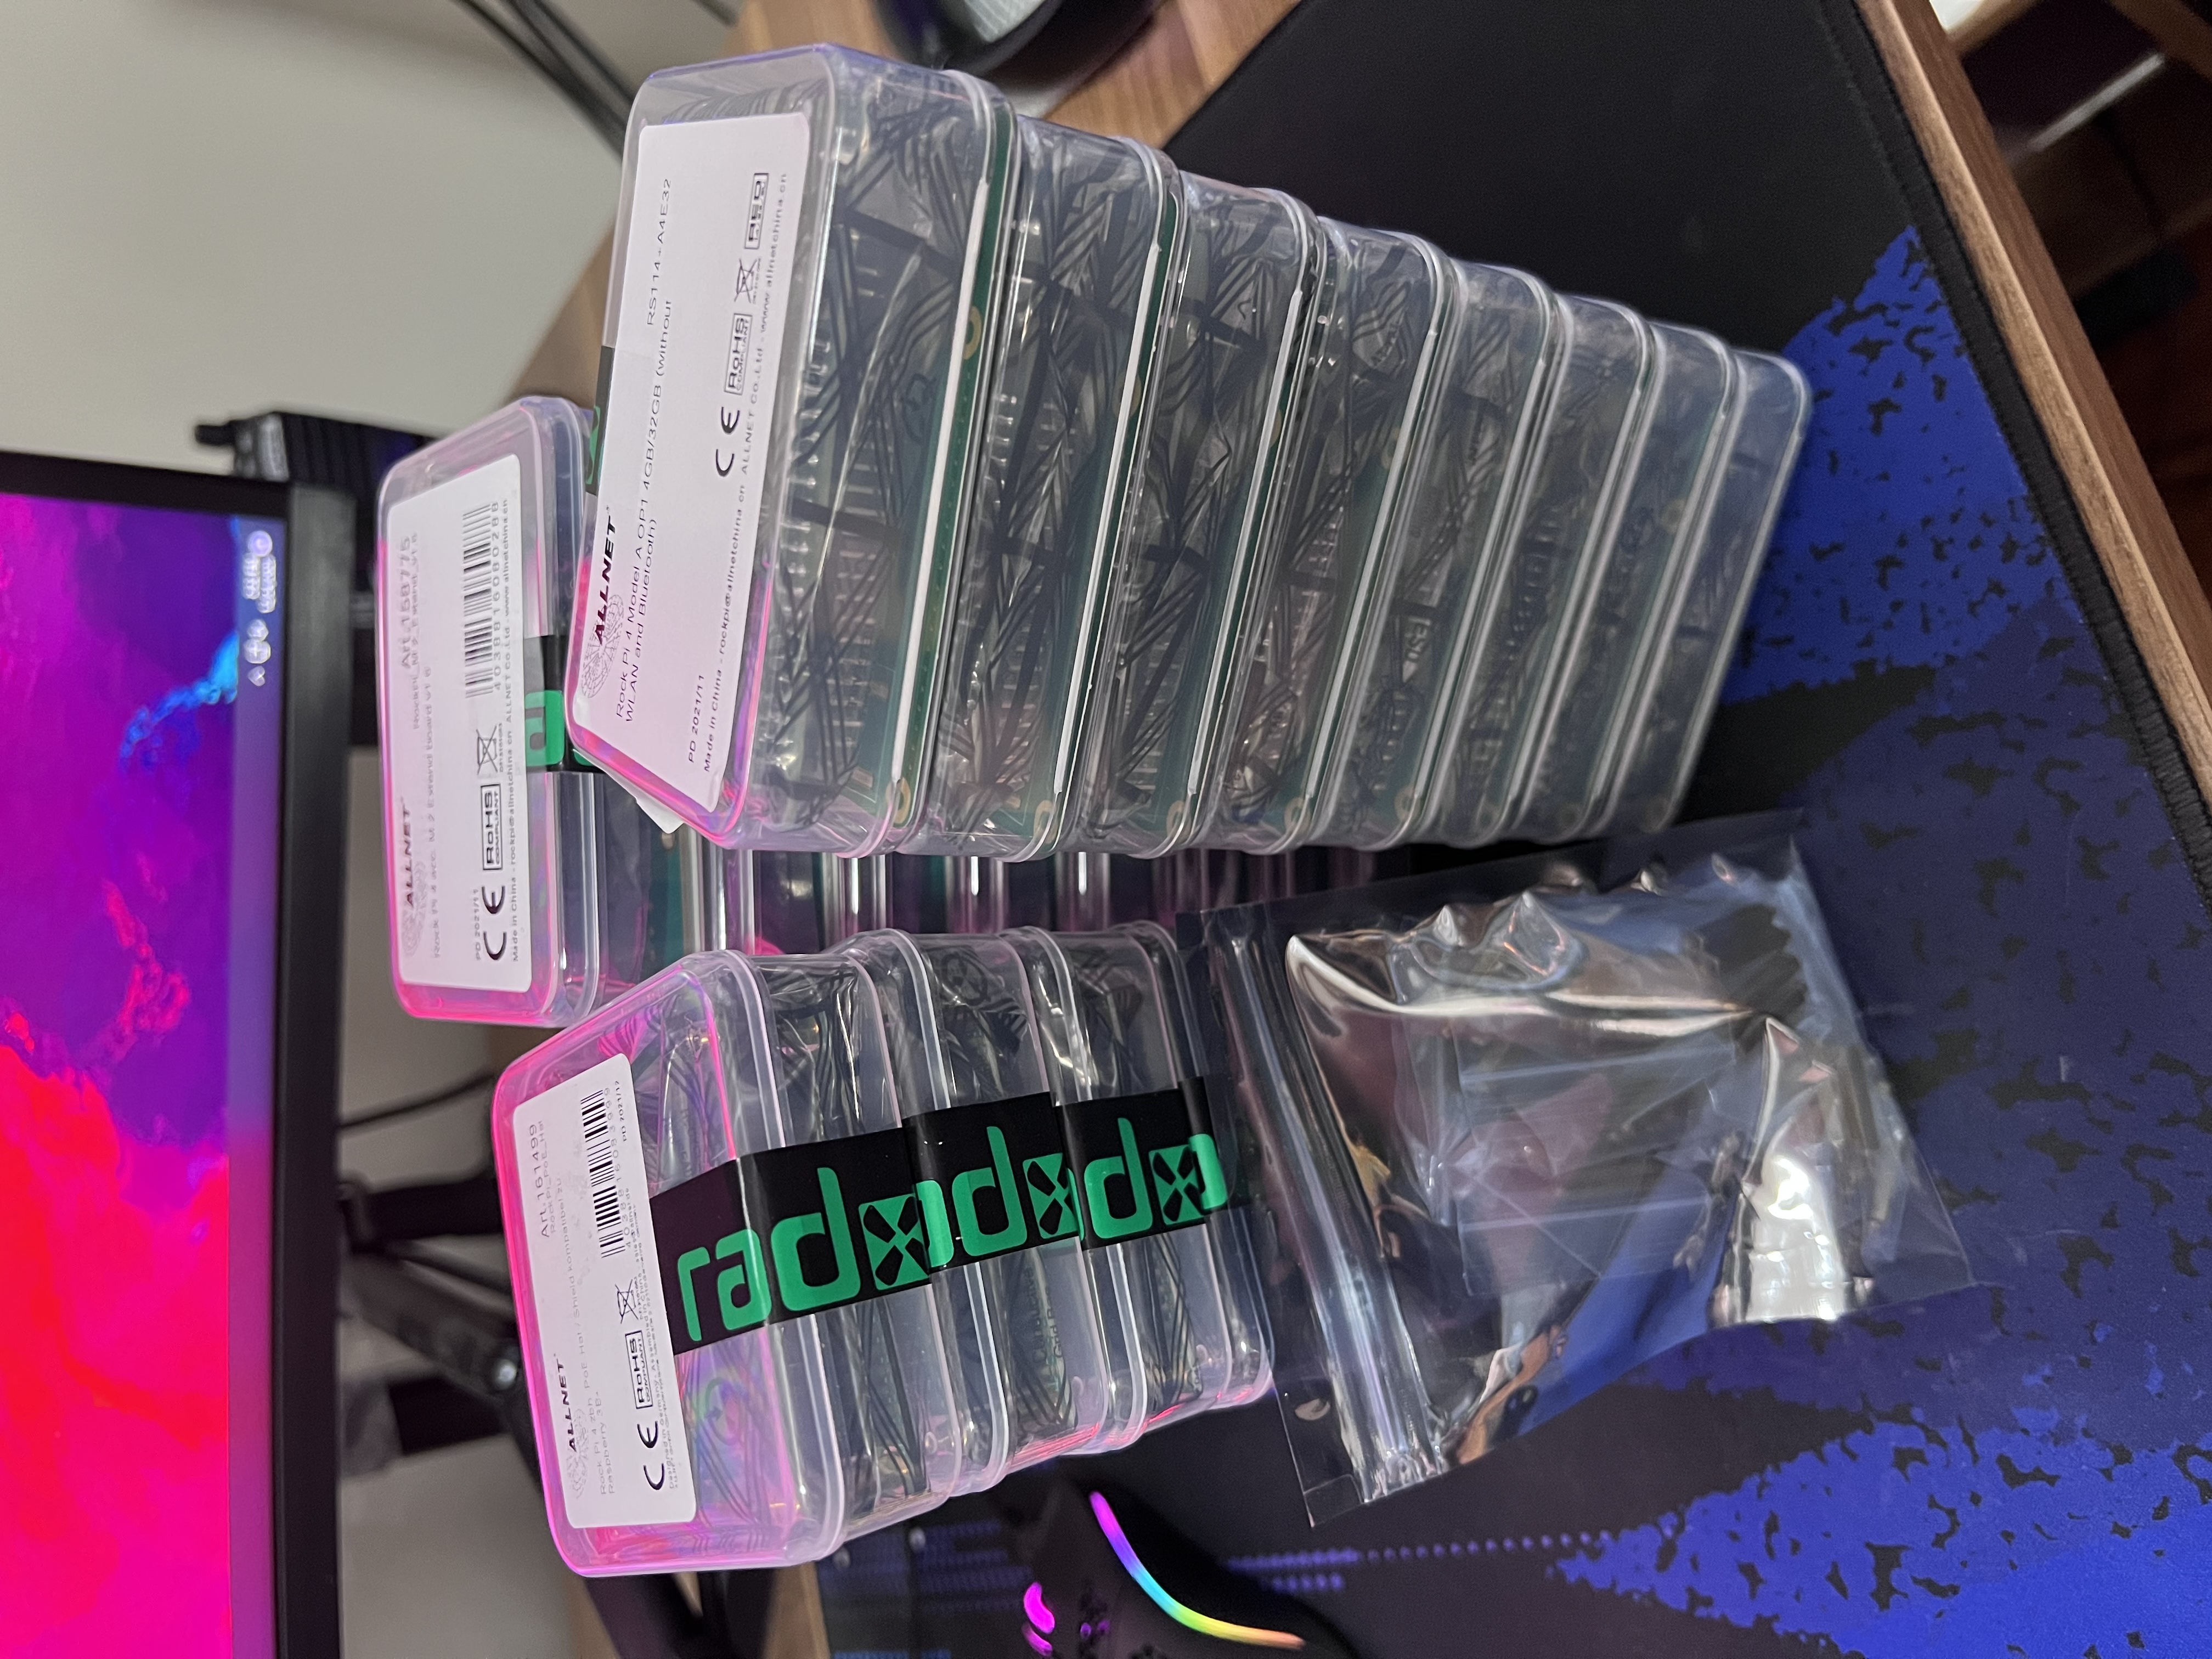
Putting all the parts together
The parts arrived five days later, and I immediately assembled them. I also bought ten 256GB M.2 NVME drives locally, with two of them as spares; went with the cheap ones that were pulled out from brand new laptops, as I'm pretty sure these single-board computers don't have enough bandwidth to maximize faster drives than these ones.
The boards were pretty easy to assemble, although I did have to skimp on screws and stand-offs because the amount of them given to me was only enough if you either went for the PoE HAT or the M.2 board (plus the official heatsink), but not both. They look stable enough though, so I just carried on. I also didn't connect the ribbon cables from the M.2 board initially since I needed access to the microSD slot. It would've been nice if I could PXE boot instead, but that would mean flashing the SPI chip, which meant I'll still need to use the microSD slot anyway.
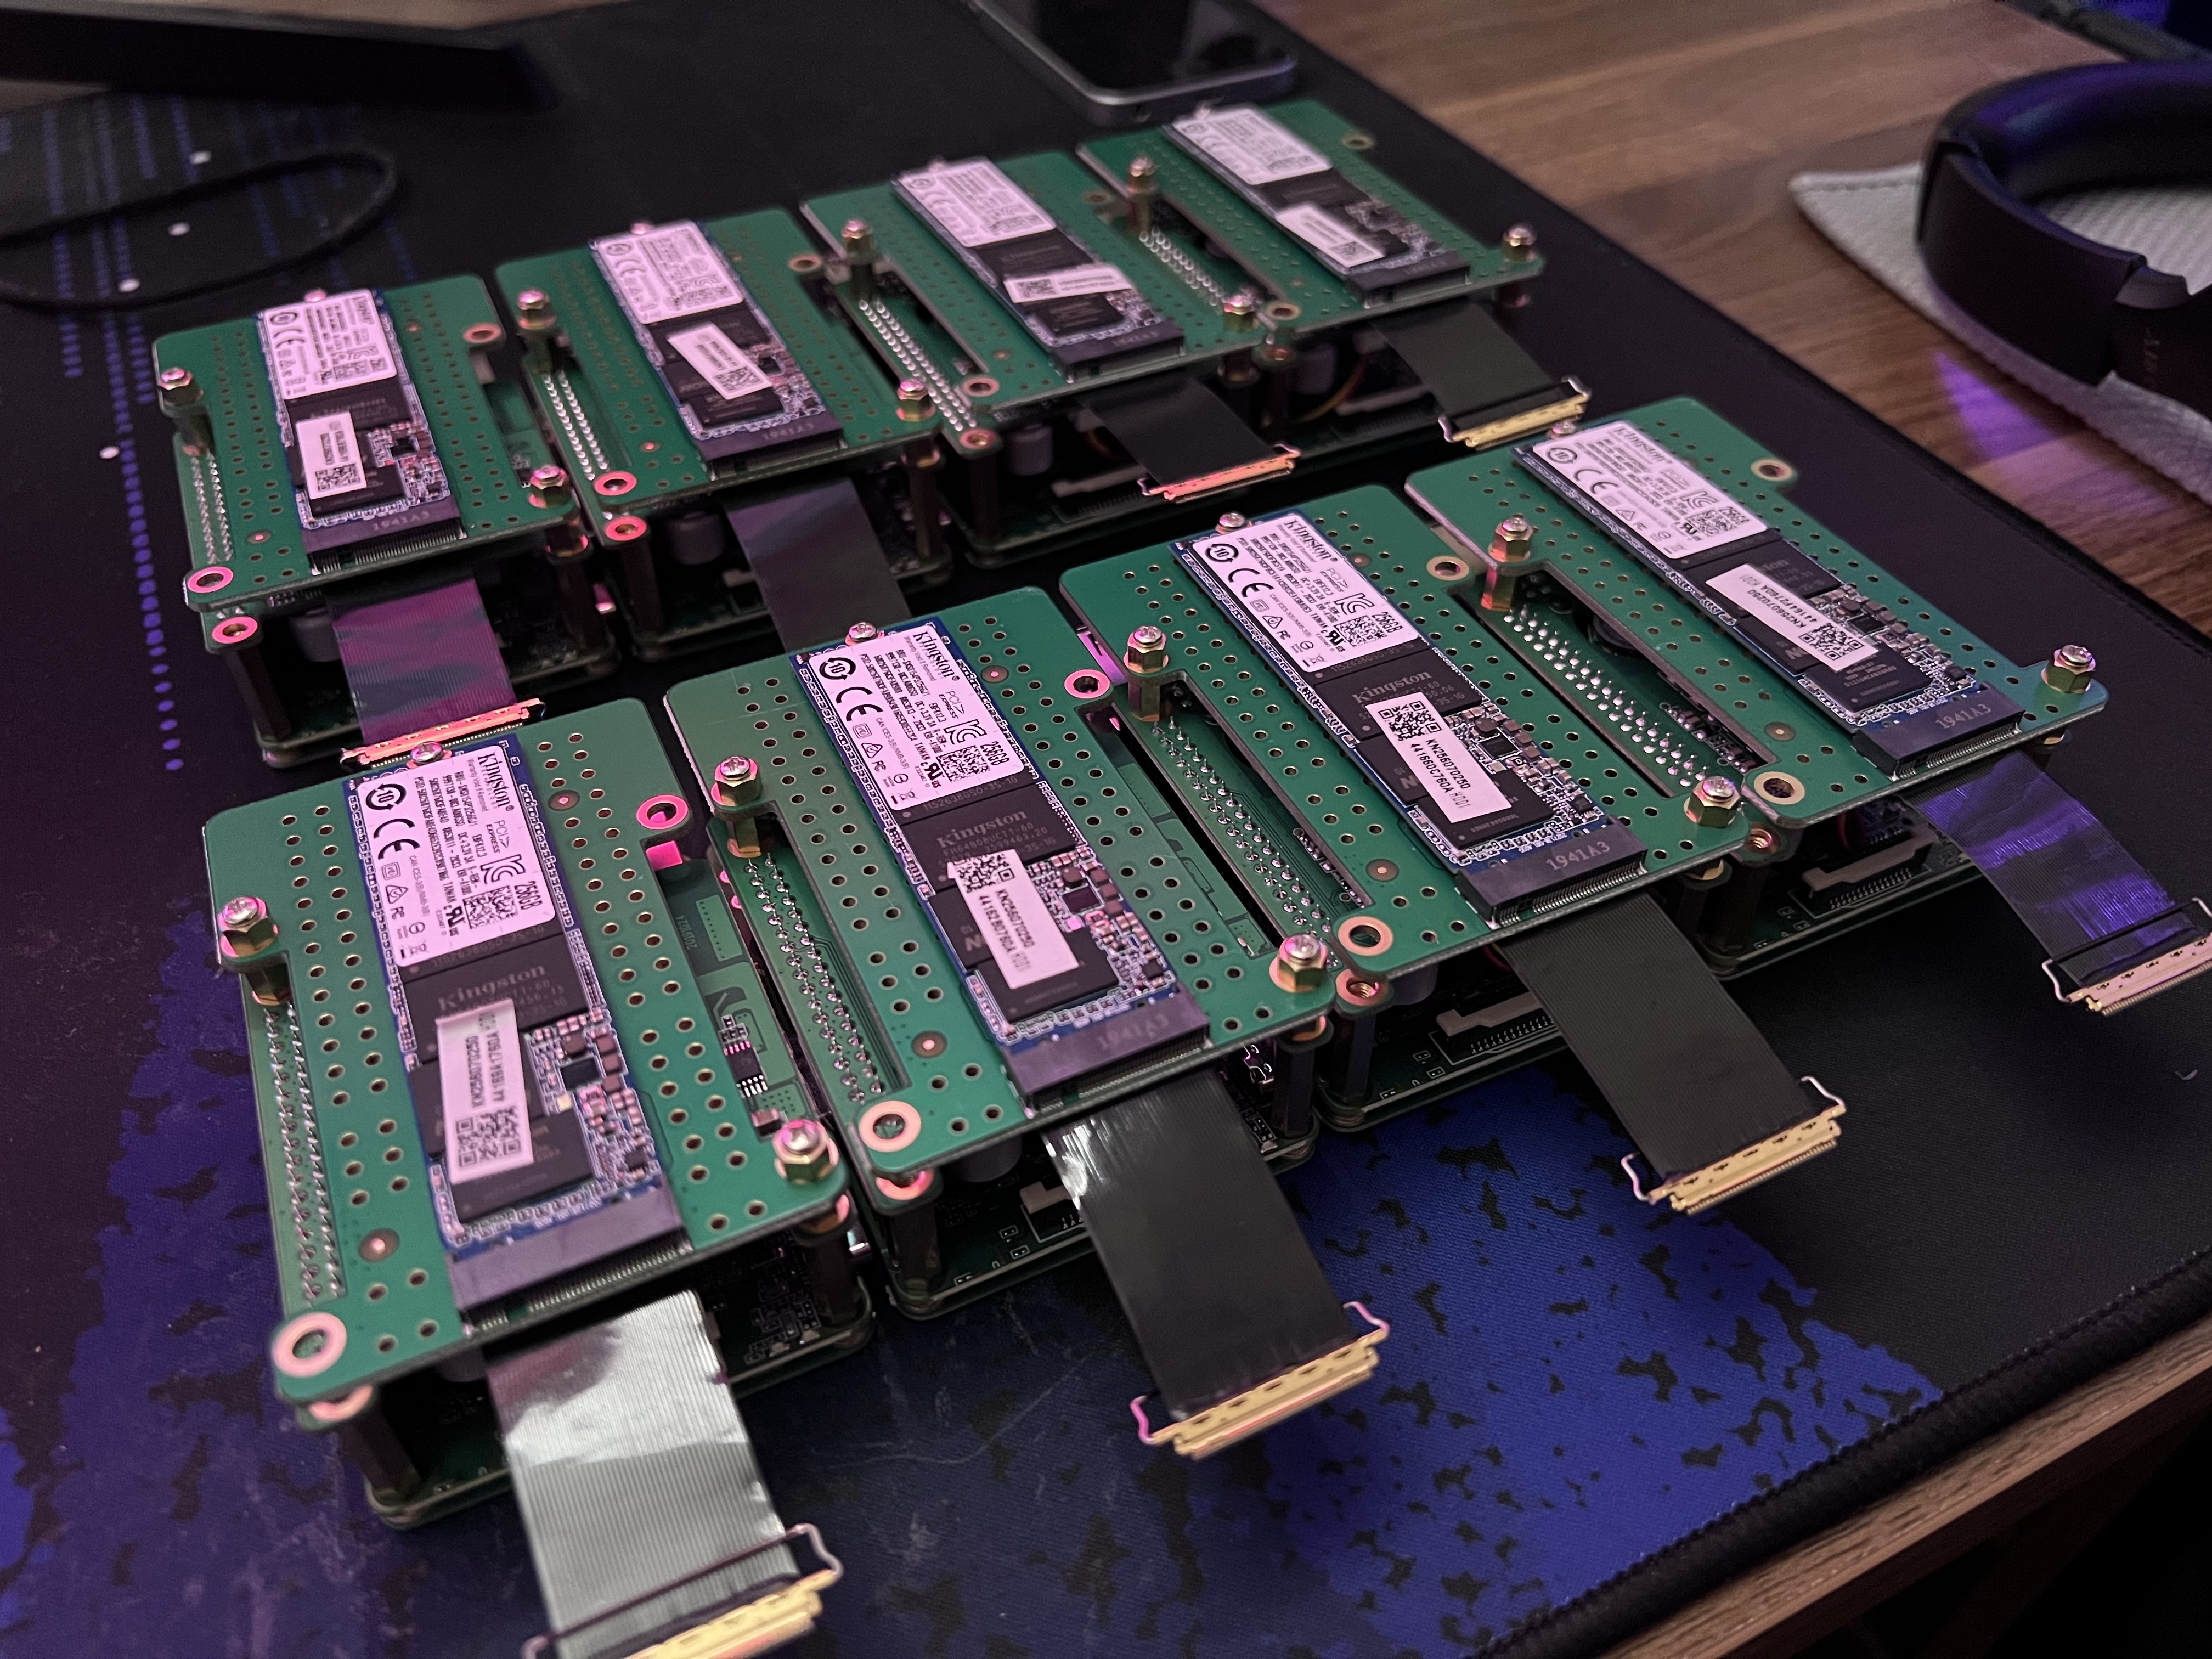
Once they were fully assembled, I went on and installed OSes into these boards. It was a journey by itself to say the least (and will be discussed further in the second part of this series), to the point that I was almost about to abandon using the M.2 drives as boot drives, but in the end, I was able to get it to work.
A few days later, the rack mount arrived. It had the Pi mounts and blank covers already installed when it arrived, so I had to remove them all to start mounting the Pis. The plastic retainers are fine; they didn't break when I pulled on them to remove the mounts, but I did follow their included instructions to a T, and I treated them with care in the first place. They do include replacements in the package, just in case.
The Pi mounts and the frame are made of metal, while the blank covers are made of plastic. They did a great job though having the blank covers blend in with the rest.
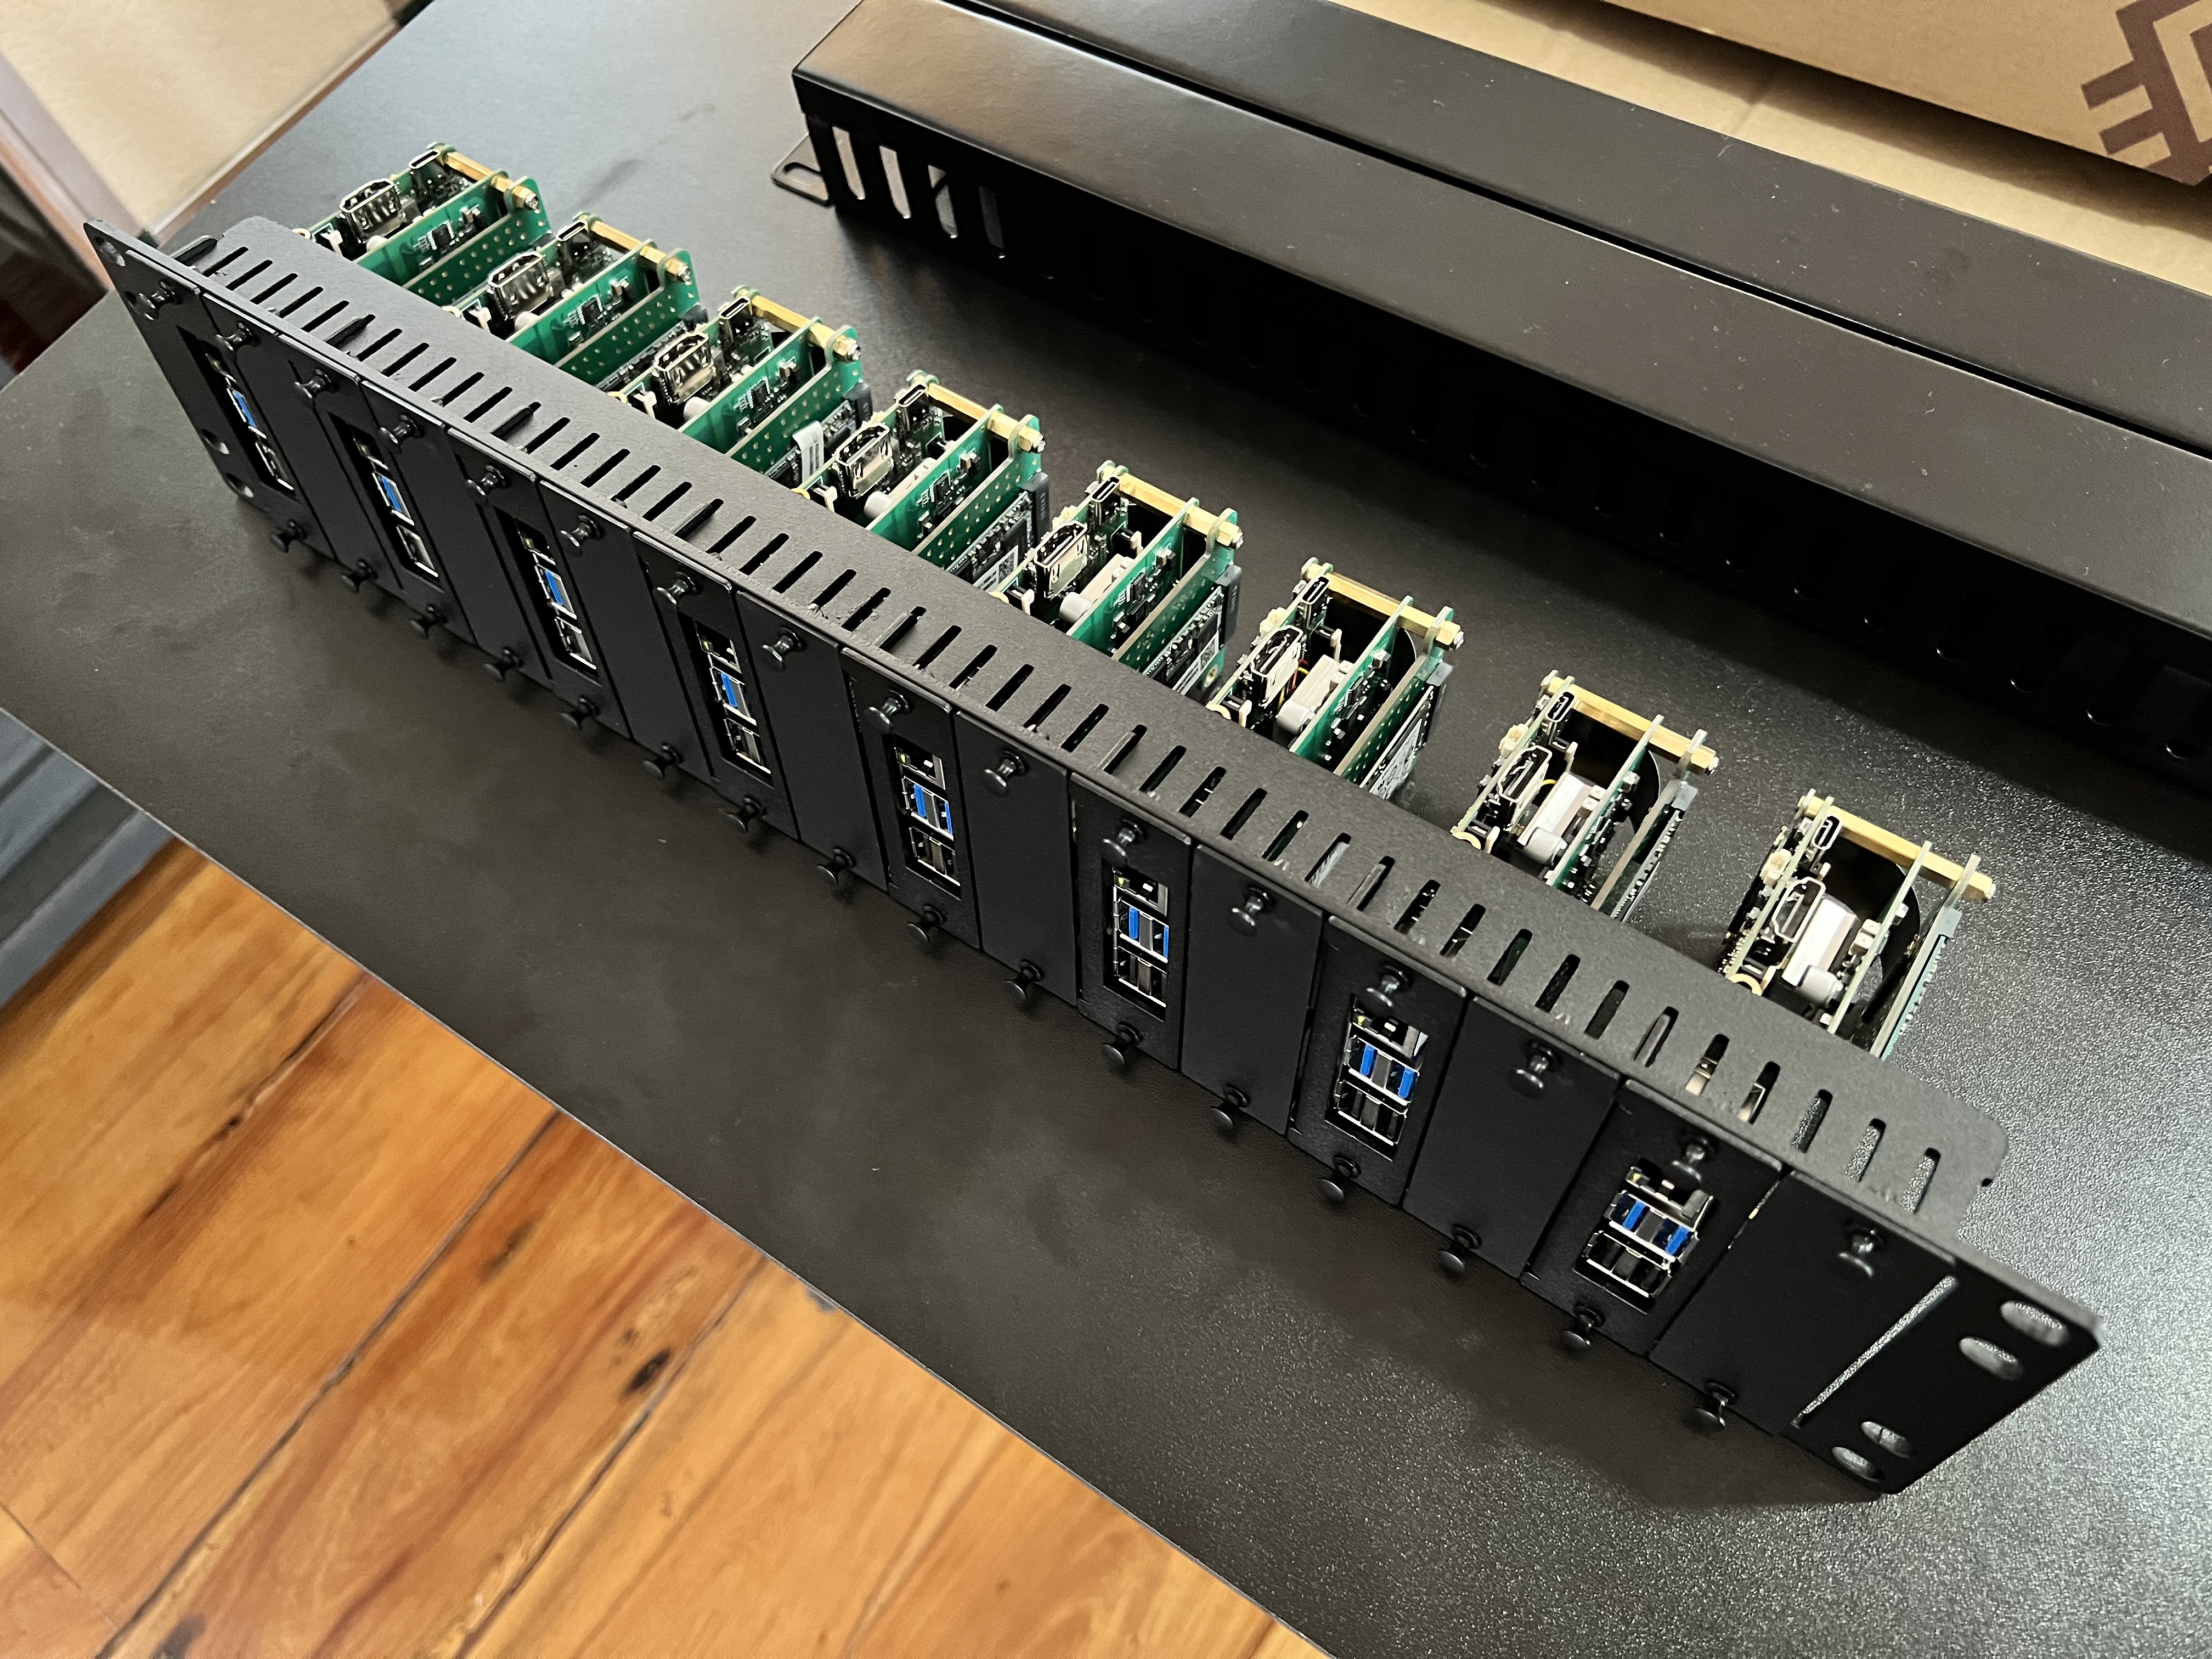
After every Pi was mounted to the frame, I mounted it in the server rack, just below my PoE switch. I bought the PoE switch (a Mikrotik CRS328-24P-4S+RM) specifically for powering up the Pi cluster, along with some of my APs and CPEs. Also bought a bunch of 1ft flat LAN cables to connect the Pis to the switch. I gotta say, it looks sooo clean. 😊
The total damage (to my wallet)
Here's the breakdown of the parts for the Pi cluster (excluding taxes and shipping, and the PoE switch):
| Qty | Item | Total |
|---|---|---|
| 8 | ROCK PI 4 Model A+ - Board only (without WLAN / Bluetooth) | $520.00 |
| 8 | ROCK PI 802.3at PoE HAT | $200.00 |
| 8 | ROCK PI 4x - M.2 Extension board v1.6 | $79.92 |
| 1 | 2U frame for Raspberry Pi (front removable) | ~$55.50 |
| 8 | Pi tray for Raspberry Pi 19-inch rack mount | ~$78.00 |
| 8 | Blank cover for Raspbery Pi 19-inch rack mount | ~$28.00 |
| 6 | Raspberry Pi screw kit (2 pcs) | ~$12.00 |
| 10 | WD/SKHynix/Kingston 256GB M.2 NVME SSD | ~$280.00 |
| Total Price | ~US$1,253.42 |
There's a couple more things that I've yet to order, like 20mm heatsinks and thermal pads for the SoC, but looking at the prices online, you can assume an additional $10-15 to cover the whole cluster.
Is it worth it?
Well, if we're talking about cost per performance, then definitely not. Remember, the three Hyve Zeus servers I currently use are magnitudes more powerful than this cluster at around 25% less up-front cost. The problem is that I couldn't maximize them given their power consumption, since most of the self-hosted applications I use don't use that much processing power to begin with.
However, if we're talking about cost per power efficiency, then the Pi cluster is definitely better. Sure, it is more expensive, but because it demands significantly less power (and the electricity prices here are kinda expensive), I can make up the 25% cost difference in around two years.
That is, if the cluster lasts more than two years, but I am fairly confident it would. These single-board computers tend to be pretty robust – my single Raspberry Pi 3 has lasted four years being my first Home Assistant, then my backup DNS and NUT server, running in a hot and humid place 24/7 with nothing but an acrylic enclosure and a tiny fan. Never missed a beat. (It still works; I'm repurposing it as a gateway for my door locks, and will post about it as soon as I get to work on it.)
As mentioned, the next part will be all about software. From the OS they use, to how I set up Kubernetes and the applications that I often run inside the cluster. Here's a hint on how it went down: This site is already running on the Pi cluster, but this used to be WordPress... So why is it now Ghost? Stay tuned for part two. 😉
